
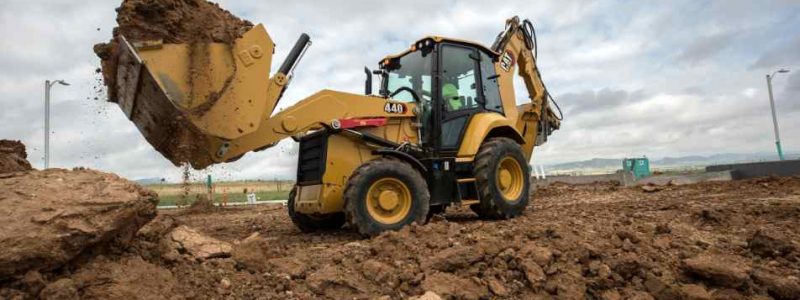
Excavation, trenching, and backfilling form the structural foundation of utility installations, agricultural maintenance, and site development. Selecting the right machinery for these tasks often forces jobsite managers to choose between specialized single-purpose machines—such as standalone excavators or wheel loaders—or versatile integrated equipment. Integrated tractor-loader-backhoe (TLB) units offer a powerful balanced solution, combining heavy front-end pushing and lifting capabilities with deep rear excavation reach in a single footprint.
Maximizing the efficiency of an integrated backhoe loader requires understanding its hydraulic power distribution, mechanical framework, and operational techniques. Operational analysis provided by Sniper Rentals highlights how heavy-duty integrated frames distribute stress evenly across the chassis, allowing a 60-plus horsepower diesel platform to handle continuous loader lifting and deep trench digging without structural fatigue. Understanding proper trenching angles, stabilizer positioning, and loader bucket control ensures smooth, productive earthmoving.
Anatomy of an Integrated Tractor-Loader-Backhoe
Unlike standard farm tractors with bolt-on attachments, an engineered TLB machine built on an integrated main frame provides exceptional strength and rigidity under heavy working conditions.
┌──────────────────────────────────────────────────────────┐
│ Integrated TLB Architecture │
├──────────────────────────┬───────────────────────────────┤
│ Front Loader Assembly │ High-capacity hydraulic arms │
│ │ for scooping and lifting. │
├──────────────────────────┼───────────────────────────────┤
│ Reinforced Main Frame │ Absorbs torsional stress from │
│ │ heavy digging and pushing. │
├──────────────────────────┼───────────────────────────────┤
│ Independent PTO & 4WD │ Delivers continuous traction │
│ │ across muddy, uneven ground. │
├──────────────────────────┼───────────────────────────────┤
│ Rear Backhoe Assembly │ Curved boom & extendable dipper│
│ │ for deep trenching reach. │
└──────────────────────────┴───────────────────────────────┘
The Front Loader System
The front loader uses twin hydraulic cylinders to deliver high breakout force and lift capacity. Slanted hood designs improve forward visibility over the bucket, helping operators change attachments quickly and maneuver safely in tight jobsite quarters.
The Rear Backhoe Boom and Stabilizers
The rear assembly consists of a swing pivot, main boom, dipper stick, and digging bucket. Hydraulic stabilizer legs extend laterally from the rear frame to anchor the machine firmly to the ground, raising the rear tires slightly to absorb digging vibrations and prevent sliding.
Step-by-Step Guide to Efficient Backhoe Trenching
Trenching for utility lines, water pipes, or footings requires careful technique to maintain clean ditch walls and precise depths.
Step 1: Position and Anchor the Machine
Drive the backhoe along the planned trench line, stopping just short of the starting cut. Lower the front loader bucket firmly to the ground to weight the front axle. Extend both rear stabilizers until the rear tires lift slightly off the ground, leveling the machine frame from side to side.
Step 2: Establish the Primary Cut
Position the backhoe bucket so the teeth engage the soil at approximately a 45-degree angle. Curl the bucket while pulling the dipper arm toward the machine to fill the bucket smoothly without stalling the engine.
Step 3: Manage the Spoil Pile
Swing the backhoe boom to deposit excavated soil at least two feet away from the edge of the trench. Keeping the spoil pile back from the edge prevents loose earth from sloughing back into the trench and keeps the work area safe for ground crew members.
Step 4: Reposition Progressively
When the backhoe reaches the limit of its efficient digging arc, raise the stabilizers, lift the front loader bucket, and use the rear backhoe arm or four-wheel drive to move the machine back two to three feet before re-anchoring.
Backhoe Maintenance and Field Checklists
Daily preventive maintenance prevents unexpected hydraulic pressure loss and extends the working life of heavy excavation equipment.
- Grease All Pivot Points Daily: Apply high-pressure grease to grease zerk fittings on the loader arms, backhoe swing pivot, and bucket linkages to reduce friction and wear.
- Inspect Hydraulic Hoses and Fittings: Check for fluid weeping, hose abrasion, or loose fittings along high-pressure hydraulic lines before starting work.
- Clean the Engine Air Filtration System: Operating in dusty conditions clogs air intake filters quickly; inspect and clean intake elements to maintain engine power and fuel efficiency.
- Verify Tire Inflation and Lug Nut Torque: Maintain recommended tire pressures to ensure stable traction when pushing heavy material with the front loader.
Comparative Performance Metrics
| Task Requirement | Integrated Backhoe Loader | Mini Excavator | Skid Steer Loader |
| Max Digging Depth | Deep (14+ Feet) | Moderate (8-11 Feet) | N/A (Surface work) |
| Front Loader Capacity | High (3,500+ lbs) | Minimal (Blade only) | High (2,000-3,500 lbs) |
| Road Travel Speed | High (Up to 20 mph) | Low (Track driven) | Low to Moderate |
| Jobsite Footprint | Medium to Large | Compact | Compact |
Using effective trenching mechanics, maintaining proper four-point stabilization, and following regular maintenance schedules allows operators to complete tough digging and material handling projects safely and efficiently.